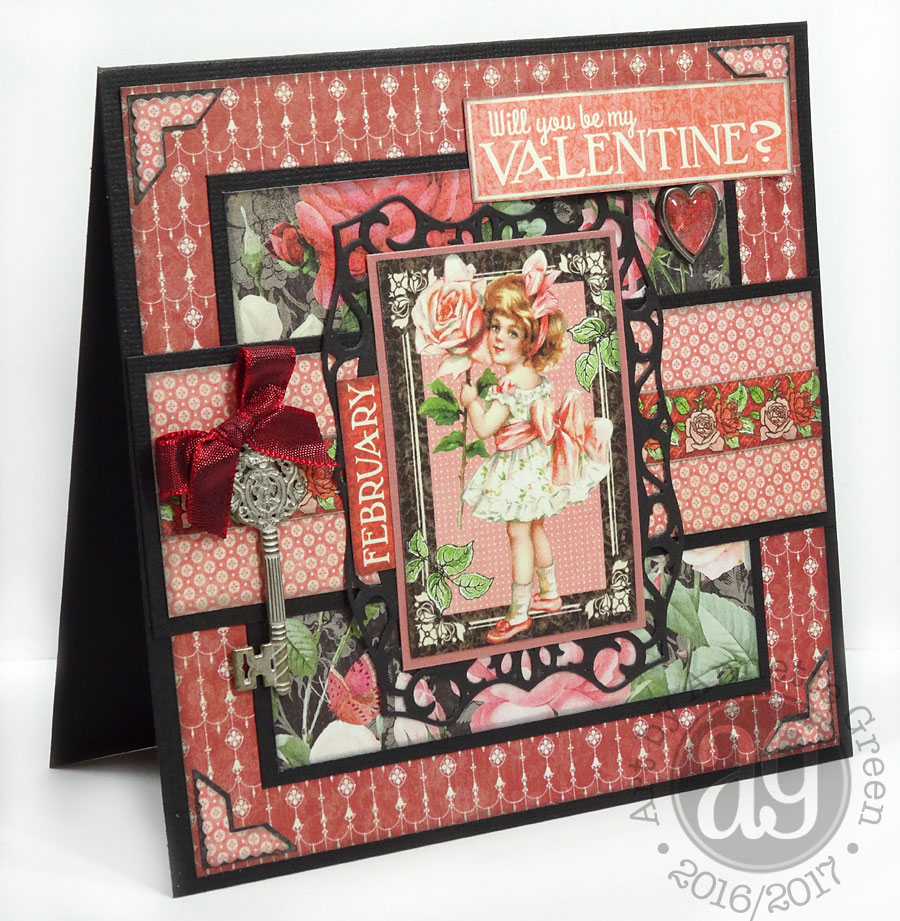
Hello and welcome back. As promised earlier this week, I'll be sharing three Valentine tutorials this week. Today is my 6" x 6" card. I listed the supplies you'll need for everything in my last post, so if you missed it, simply go back and check it out. Let's get started...

From Graphic 45's Children's Hour 12" x 12" collection, cut apart the images you see above from the February Collective page, making sure not to cut into any other imagery on the page, since some of those pieces will be used in the next two projects. The floral strip on the left edge measures 5 3/4" long.

Select a red print and a pink print from the 6" x 6" Mon Amour Patterns & Solids. (I failed to list a third sheet in the supply list you would need for the pink band portion, sorry). Cut the 6" x 6" pieces down to 5 3/4" x 5 3/4" each, then the additional pink band to 5 3/4" x 1 3/4".

From Mon Amour's "Dearest Darling" 12 x 12 paper, cut a 4 1/4" x 4 1/4" square, and a 5 1/4" x 1" strip. From the back side of the Children's Hour February Montage page, cut a strip 5 1/4" x 3/4" then scallop one long edge as shown.

Cut a card base 6" x 12" from black card stock and score in half to make a 6" x 6" folded card. (My card opens from bottom to top, but if you prefer you can make yours open like a book, right to left.) Cut a strip 6" x 2" and a square 4 1/2" x 4 1/2". Save the extra black card stock scraps for the next step.

Cut a 5 3/4" x 5 3/4" piece of ivory card stock, a 2 1/8" x 3 1/8" piece of vintage pink card stock, and die cut a decorative rectangle from the remaining black card stock. (I used Spellbinders Nestabilities Labels 40 Decorative Elements.)

Assemble the pieces shown above. (I inked all the edges of my papers with Hickory Smoke Distress Ink before assembling.)

Notice that you'll need to cut out the word February from the calendar you cut apart earlier.

If you have a corner punch, you can dress up the corners by punching four corners from pink pattern paper, then backing them with some scraps of black card stock. Here I'm demonstrating how you can adhere the corners to a square piece of black, then snip through the center for an even and balanced corner unit.

Begin assembling pieces to your black card stock base as shown.
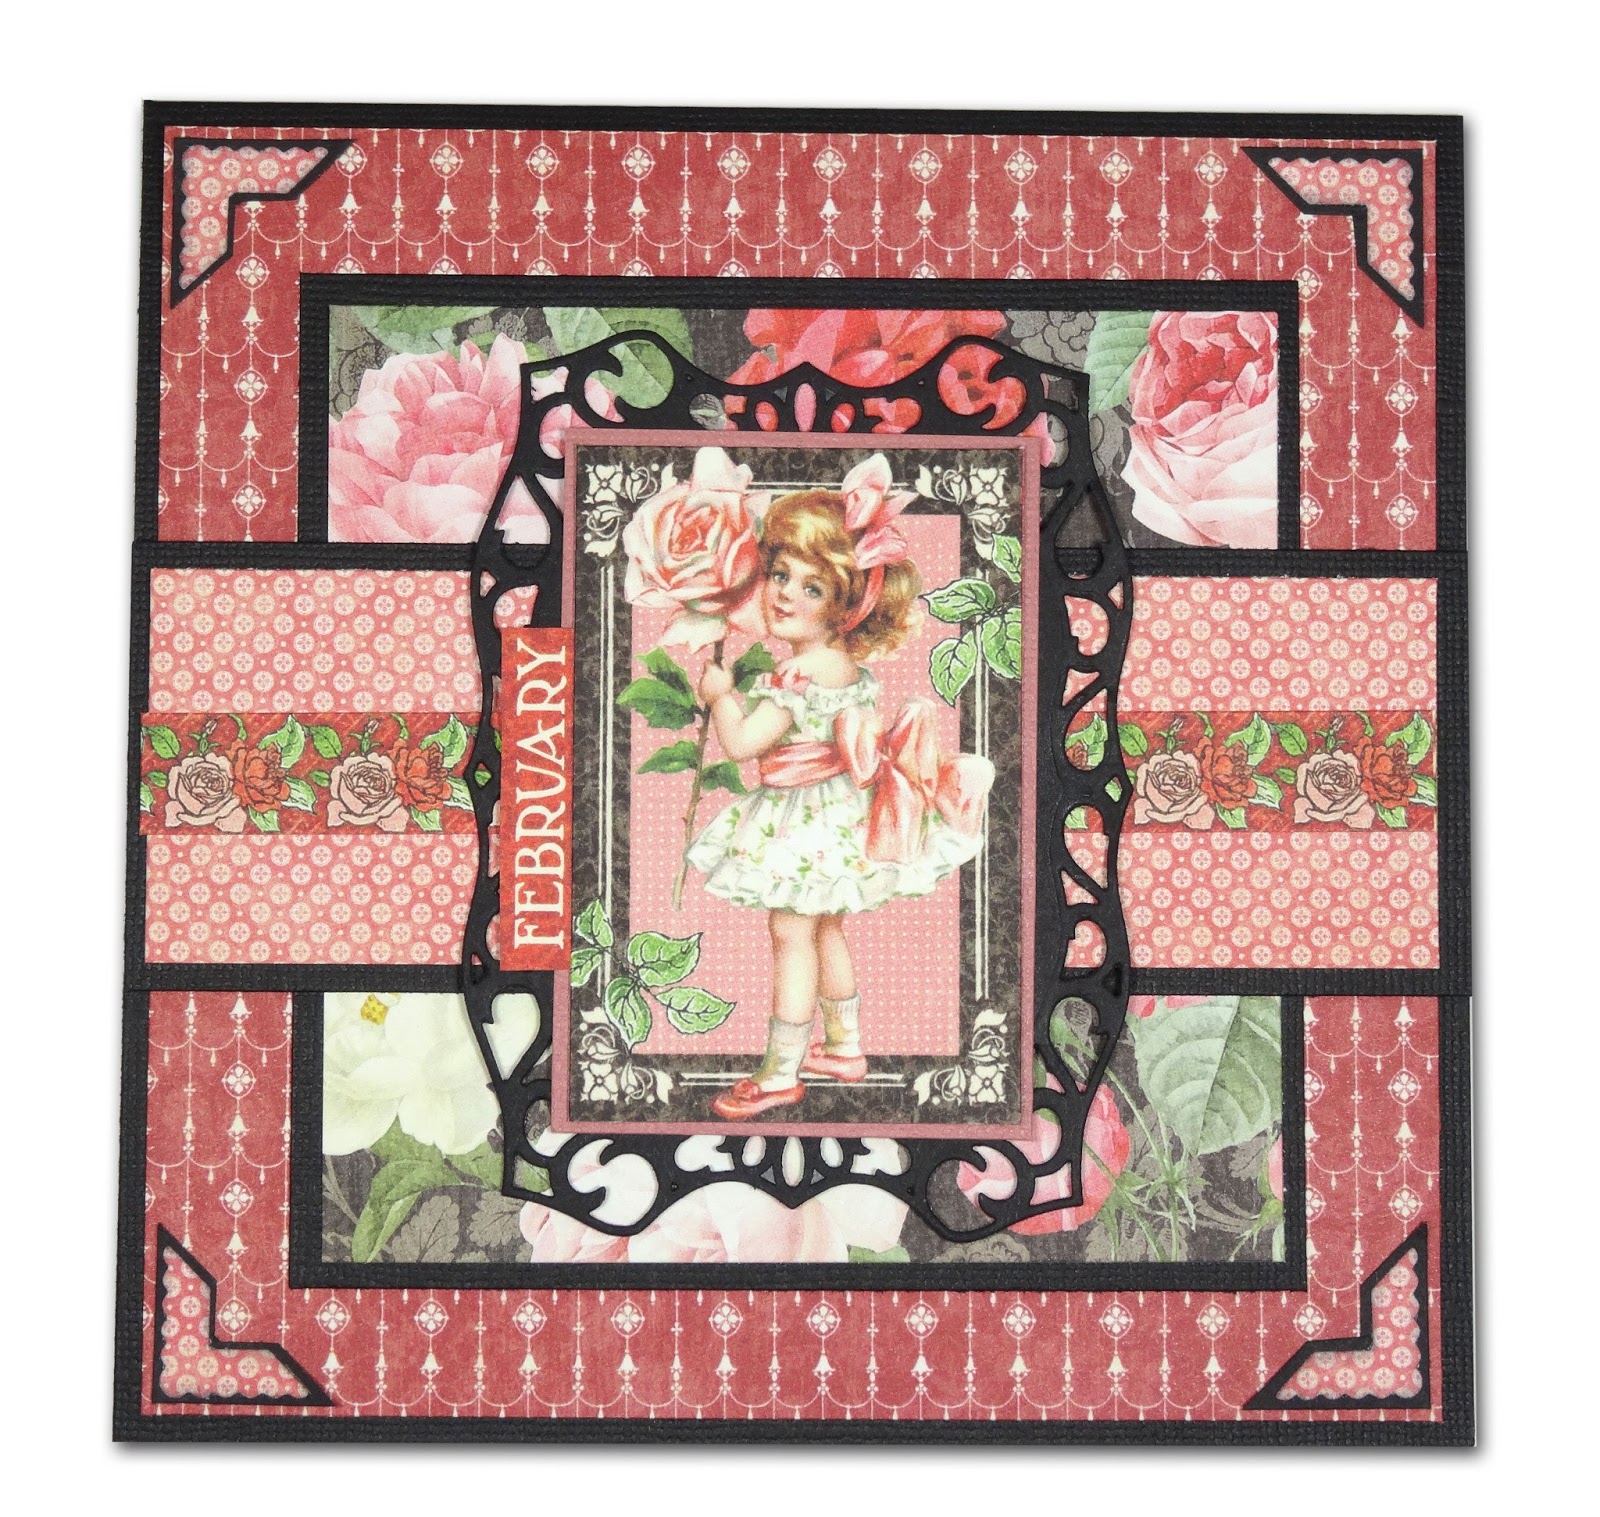
Layer on the center unit. So far I've adhered straight down to the card, no foam tape, to keep the thickness to a minimum for mailing. I like to use Scor-Tape for the layered bits for a strong hold.

Adhere a large Graphic 45 Shabby Chic Key to the card with E6000 glue. Tie a 10" length of red shimmery ribbon into a bow and adhere to the top of the key with Fabri-Tac. Set until dry.

Give the "Will You Be My Valentine" cut-apart a wavy look by running the strip along a narrow dowel or a smooth pencil. This breaks up the paper fibers so you can create some movement for added dimension. (see next photo) I added a heart charm (Tim Holtz Idea-ology) just below the strip.

Add two layers of foam squares under the Valentine banner at the highest point, and adhere the ends directly to the card to keep that wavy banner appearance.

Finish off the inside of your card with the remaining pieces.
You can find full pads as well as single sheets of all 12" x 12" Graphic 45 papers online at Scrapbook.com or visit your local scrapbooking store.

Join me tomorrow for another fun tutorial, as I share how to create the cute little heart-shaped box. Perfect for holding special sweets or a small gift. Then Friday I'll share how to make the gift bag. I hope you join me!
Now, as my thanks to you for following along, I have a GREAT give-away planned for one lucky winner. All you have to do is leave a comment on each day of my three Valentine tutorials. I'll pool those names together and draw one winner who will receive a wonderful mixture of Graphic 45 goodness! I'll post the winner this Saturday right here on my blog and on my social media sites. Good luck!!
Absolutely gorgeous! And the layout of the card would work so beautifully with other G45 papers for other occasions too. I'm already picturing it turned the=rough 90 degrees with some of my favourite Artisan Style papers.
ReplyDeleteJane
Love, love, love your creativity! And your willingness to post these great tutorials!
ReplyDeleteThank you for sharing this tutorial for your beautiful card! Your creativity is always inspiring!!
ReplyDeleteYou never disappoint. These projects and especially this card are absolutely beautiful. Thanks so much for the tutorial.
ReplyDeleteYou never disappoint. These projects and especially this card are absolutely beautiful. Thanks so much for the tutorial.
ReplyDeleteThis is beautiful! Thanks for sharing.
ReplyDeleteThanks you so much for sharing this card idea. Love Graphic 45 products!
ReplyDeleteI love everything you make and am truly inspired by you. g45 is my favorite product line so of course I would love to win! Love to design for them in the future.
ReplyDeleteThank you very much for sharing your creativity. I love all your work. I don't miss any of your works. I will definitely make use of your ideas. I have no much words to say how I'm delighted to see your work.
ReplyDeleteJust found you on FB and so pleased i did, loving your work ,your designs are fab.
ReplyDeleteElaine H X
I agree with other pisters that this layout would be so adaptable to other themes. And I love how suvh a simple construct finishes with such dimension. Great card!
ReplyDeleteBeautiful-love the vintage, holiday look!
ReplyDeleteIt's a beautiful card, simply made, with instructions that can be easily followed! Thank you.I am recovering from total knee replacement surgery and I find that my attention span for crafting or most of everything is rather short. These instructions can be followed in steps rather then from beginning to end and the card will turn out beautifully. Thank you. Carole
ReplyDeleteIt's a beautiful card, simply made, with instructions that can be easily followed! Thank you.I am recovering from total knee replacement surgery and I find that my attention span for crafting or most of everything is rather short. These instructions can be followed in steps rather then from beginning to end and the card will turn out beautifully. Thank you. Carole
ReplyDeleteThank you for the tutorials. I love your projects and the tutorial really let us make your beautiful projects too.
ReplyDeleteAgain Annette you always go outside the ordinary with your crafts and inspire me with everything you make! Love this and will definitely be trying it myself! Thanks so much for all of your inspiring creations!
ReplyDeleteYay! Tutorial for a great card, TFS!
ReplyDeleteThis comment has been removed by a blog administrator.
ReplyDelete