Close To My Heart's annual Convention starts this Wednesday through Saturday and although I've been crazy busy and hardly had time to think about it, I'm finally getting excited! I spent my Sunday afternoon making some fun goodies for my attending team members, and I'll show you how easy these Memo Notebooks are to make. (Warning: if you make one, you'll want to make a million of them!)


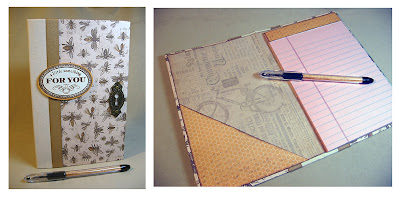


I can't take credit for the idea. My friend Charmin taught me how to make these a few years ago and I've made so many of them over the years. They make great gifts because once the notepad inside is used up, you simply pull it out of the sleeve and replace it with a new one.

This is also a great opportunity to use leftover pattern papers and embellishments. I used all current Close To My Heart papers along with the Dream Pop promotion pack, and embellies in my stash from the past seven years as a consultant. I loved using up older items. The paper above is Chantilly. I used the "For A Friend" stamp set on each notebook.
Here's a look at the others, then I'll show you how to make them...

Dream Pop promotion papers.

Dream Pop promotion papers.

Buzz & Bumble papers.

Claire papers.

Dream Pop promotion papers.

For Always papers.

Okay, now how make them. This is my notebook. (Tim Holtz all the way, baby!)

These two pieces of matboard are your covers. I buy bulk packs of 12 x 12 matboard from Hobby Lobby inexpensively. You get a ton in all different colors and textures. Perfect for projects like this where you cover them completely with paper. I just got a RotaTrim Mastercut II trimmer for heavy-duty materials like chip and mat board. Cuts like buttah! (You can also use a straight-edge and sharp Xacto blade)

These papers are for your covers, so pick your favorite. This is from Tim Holtz's Destinations pack.

From coordinating papers, cut the above. The triangle piece will serve as a pocket for the inside front cover. You won't use the other half, so stash that for another project. The 2 x 5 strip above will be adhered to the notepad.

This piece will be the lining inside of your notebook. Neutral and not too busy. Perfect.

You'll see where this goes in a bit.

Stick-Back Canvas by Claudine Hellmuth (a Ranger product) comes in natural and white. Some of my notebooks above used white, some natural. I'm using natural for mine. This stuff cuts easily on a regular paper trimmer.

Now you're ready for assembly. Flip your pattern papers for your covers face down then adhere the matboard pieces to them as shown here. Flush the inner edge, then you can start folding in the corners and adhering them. I used Scotch Mega Glue Stick for all of this.

Close-up of corner. The mega glue stick comes out purple and eventually dries clear.

Now you can fold in and adhere the rest of the paper.

This is what you'll have.

Next you'll flip your covers face up with a 1/2-inch of space between them. Make sure they are lined up square top and bottom, then peel and stick your Sticky Back Canvas strip centered down the middle. Press and smooth this down well with your hands. You'll notice I inked the edges of the canvas beforehand. Walnut Stain Distress ink.

Flip the whole thing over and fold the excess canvas to the inside.

Ink the edges, if desired, of your large piece of pattern paper then adhere with glue stick to the inside of your notebook. Make sure to use plenty of glue and get every area covered, especially the corners. Burnish this down well.

When you fold your notebook closed, this is how it looks.

For added embellishment, I adhered some ruler ribbon to my covers. You can also do this step before the inner paper goes on and tuck the excess ribbon to the inside. Or you can do like I did here and just trim the ribbon excess.

Ink the edges of your triangle piece and adhere to inside of notebook using Scor-Tape on the left and bottom edges only to create a pocket.

Wrap the 4 x 8 inch cardstock piece that you scored around the base of your notepad. It shouldn't be too tight. You want to be able to slide the pad out and replace it with a new one.

Flip the notepad around and add some Scor-Tape to the back flaps of the card stock only. I just leave the notepad in place, but you can take it away if you like.

I usually pick up the notepad with this cardstock piece and just stick it all in place, but for my photo here I adhered the cardstock in place for now so you can see it.

Then you can slide the cardboard part of the notepad into the sleeve, but first...
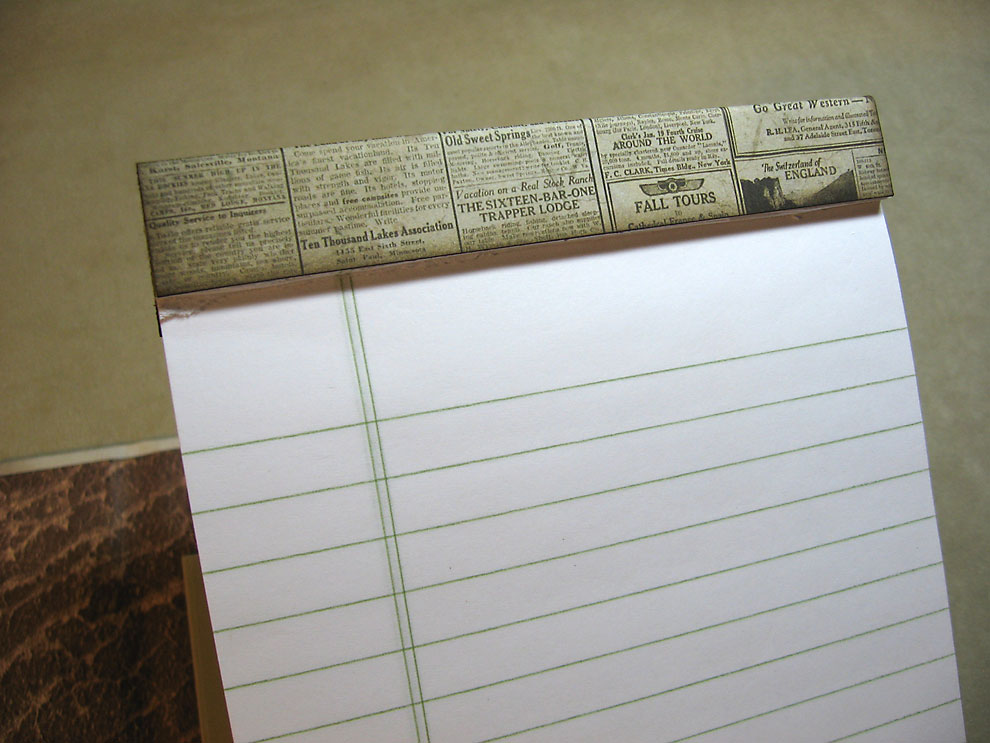
You can dress up the notepad by inking the edges of the 2 x 5 inch piece and then adhere to the top of the notepad and fold over to the back. (You'll have to do this step each time you replace the notepad, but it's super easy, so no big deal.)

Now you can slide the notepad into the sleeve.

You can now embellish your covers as desired. I added some metal photo corners with the help of my trusty craft hammer. No adhesive required!

I grabbed some grungeboard letters to spell out Journey and painted them first with Black Soot Distress Paint, then added some Antiqued Bronze Distress paint with my finger to distress it.

Philosophy tag with the word "Artful" plus a vintage style postcard tag with twine.

Oh, and let's not forget the pen. Pentel ballpoint pens (WalMart, Office Depot, and just about anywhere) are best because the tube is clear and the ends unscrew, so you can roll up coordinating paper and slide it right inside for a decorative matching pen.

Cut a coordinating paper 3/4 x 3 1/4 inches. Then grab a thin wooden skewer or something similar.

Roll the paper tightly around the skewer to get the shape and curl you need, then slide the paper into the pen's tube. Then you can screw the pen's tip back on.

Here's another look.
So, here's my question...
Will you try one yourself?
If you do, please come back and let me know how it turned out. And if you're really proud of it, I'll accept photos to re-post here for all to see. Just e-mail them to me at AnnetteGreen@me.com.
Thanks for stopping by today. Have an awesome Monday!
Thanks for sharing, and making the tutorial!! I will be making a few of those.
ReplyDeleteAwesome project, Annette! Thanks for the inspiration and for being so thorough in photographing and explaining the entire process. Have a wonderful time at convention!
ReplyDelete:) Marie
Thank you for the directions! These may become my new favorite thing to make!!
ReplyDeleteHeading to Staples for notepads NOW!!
ReplyDeleteKILLER Project - what a fabulous idea!!! Easy, fun, great gift. I wan to go make one RIGHT NOW!!. The pen is the crowning touch! Thanks for the great tut!
ReplyDeleteAnnette, this is a wonderful tutorial, thank you for taking time to share. I'm going to give this a try.
ReplyDeleteThis is exactly what I was looking for. I bought a pack of these yesterday and I'm so glad I found your tutorial. My family is getting these as gifts. Thank you
ReplyDeleteGreat tutorial, very easy to follow.
ReplyDeleteThanks so much for sharing this idea