Hello everyone! Hope your Wednesday is going well so far. I've been creating a fun Halloween card this morning that I'd love to share with you. It's created with All Things Tim, as I like to say, meaning all Tim Holtz products. Check it out...


The Undertaker! My current favorite Stampers Anonymous stamp set for the season. He takes front and center on my 5" x 7" card. Let me take you through how I made this card, and I'll share the links to all products at the end of the post.

My card base is black Kraft Core card stock folded to make a 5" x 7" card. I cut a burnt orange piece 4 3/4" x 6 3/4" and a light tan piece 4 1/2" x 6 1/2".

From the 8" x 8" Regions Beyond paper stash I cut 8 pieces 5" x 1 1/2".
(I added an eighth piece later.)

Working on my non-stick craft sheet, I adhered the strips (after inking the top edges with Black Soot Distress Ink) onto the light tan card stock, turning and tilting the strips as I moved my way down. I did this on the non-stick craft sheet because the strips have sticky adhesive on them and are hanging over the edge of the light tan card stock. This makes it easy to peel up and trim later.

I trimmed all the overhanging paper strips and inked around the perimeter with more Black Soot.

After sanding the edges of the black and the burnt orange card stock pieces, I adhered the three elements together.

My light is rather bright in this photo so you can really see the reflection on the ornate frame. I die-cut it from Tim's Kraft Core Metallic Collection, using the Bronze color. I sanded the surface a bit to make some scratches, then inked the outer edges with Black Soot. The inside of the frame is tan Kraft Core card stock.

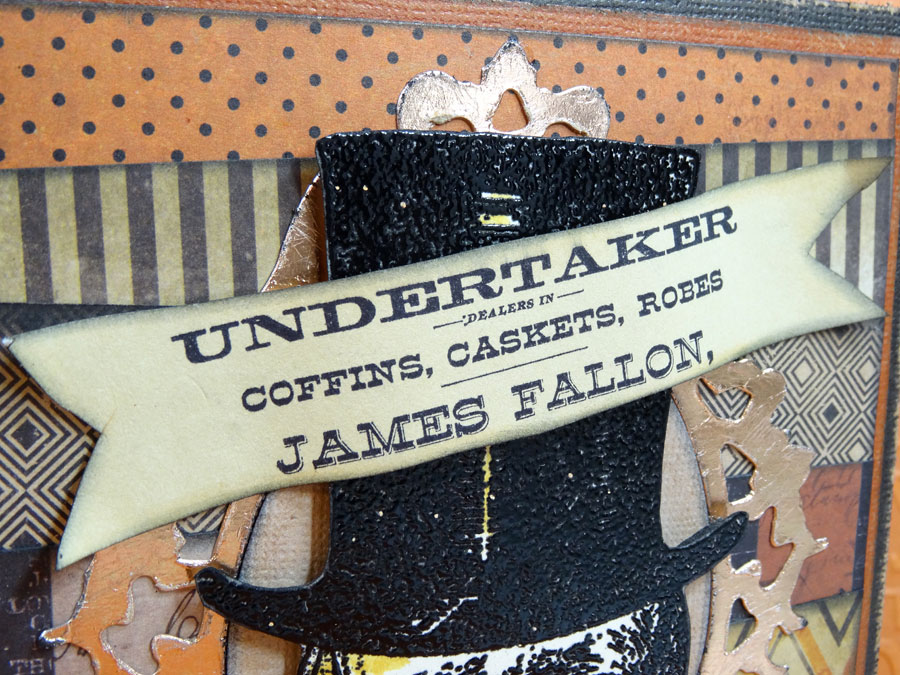
I stamped the large "Undertaker" (there are two sizes in this great set) with embossing ink and embossed it with black embossing powder. Once it was cool, I shaded a soft yellow along the left side of his face, then cut him out close to the stamped edge.

Next I stamped this image onto more of the light tan card stock. I free-hand cut the banner quickly and loosely so it looks a bit distressed.
I have to wonder if "James Fallon" is a nod to the funny man Jimmy Fallon of The Tonight Show...? (I'm a big fan, so it got my attention.)
I popped up the Undertaker with foam tape then added the banner with more foam tape, just in the center, and glued down the ends. This gives it some dimension.

I die-cut the medium size bow from the Bow-Tied strip die using Black Kraft Core card stock and adhered it below the Undertaker. Like a bow tie, of course. Below the bow is one of my favorite new embellishments this season called Crypt Cameos. There are five different cameos in each pack and they are substantial! I could easily make a fun necklace out of one of these. Maybe that's next on my agenda...
Here's a look at the completed card one more time.

Oh, and we can't forget the inside of the card. More stamps in the Undertaker set. I really love the Happy Halloween font, don't you?
Annette what a fun card. Loving the tilted and turn prices on the base. Makes a great background. Have been wondering how to incorporate those cameos. Thanks for the inspiration.
ReplyDeleteIt is what one might call love at first sight!!!!
ReplyDeleteSandy xx
What a great idea giving the Undertaker a bow tie, super fun.
ReplyDeleteJulie x
Fa-BOO-lous, card, Annette!! Love the layered paper background and that snazzy bowtie you gave this skeletal gent! I've got some birthday's coming up in October, and this design would be a great way to bring in a Halloween theme to b-day time :) Hmmmm...good thing I just got this Undertaker stamp set :) :) XOXO-Shari
ReplyDelete