I have so many goodies from Eclectic Paperie that today I thought I'd make a fun easel card. Everything I used came from the eP store. Be sure to check it out as they are getting new stuff from CHA almost daily.


The card measures 4 x 5 when folded flat, to give you an idea of the size when popped up as an easel card. My main focus was the use of the Vintage Cabinet Card dies from Tim Holtz. I love layering them to create a 3D frame. Back in October I made a Halloween display using three of them hinged together, and each frame was filled with creepy goodness. You can check it out here. The post right after it explains how I put it together.
Okay, so here's how I made today's easel card...

First, I cut some black chipboard and this paper from Authentique at 5 x 6 inches and adhered them together with glue stick. I really like Scotch Mega Glue Stick.

After the glue was good and dry, I ran the piece through the Vagabond using the Vintage Cabinet Card die. This will be my main background.

More Authentique paper and black chipboard glued together. Same size.

Then I nested the Mini Vintage Cabinet Card die (Mover & Shaper) into the larger die. It's magnetic, so it holds itself in place nicely. And then I cut the piece out.

Next I cut a strip of black chipboard at 3/8 inches wide and 12 inches long. Plus another small piece at 3/8 x 2 to finish the perimeter. Hard to see here, but I softly scored this strip and glued it to the frame cut-out from the step before this using Alene's Super Thick Tacky Glue. I set that aside to dry.

From Tim's "Stacked Words Valentine's" die, I cut this hugs & kisses from white cardstock and adhered it to the main piece.

This just shows crazy I am. I used foam tape to pop up the die cut. You can't even imagine how small some of those little pieces of foam tape are. But it's a step worth taking the time for, in my opinion. I like things solid and secure.

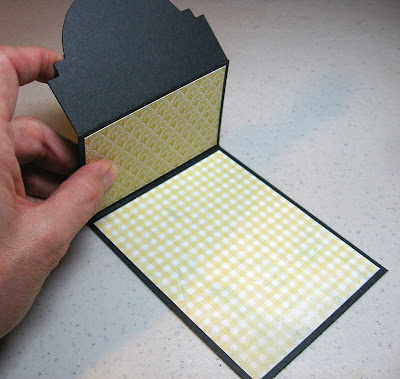
Next I cut another piece of black chipboard a 4 x 7 1/2" and scored it at 2 1/2" from the left edge. Then added some more Authentique paper as you see here. This piece is the bottom base of the easel card.

I cut another Vintage Cabinet Card piece from black chipboard and scored it at 2 1/2 inches from the bottom edge bending the top part back. (yes, my chipboard is thin, therefore easy to score and fold.)

Then I adhered this piece to my base piece like this. The scored area is now overlapping the base piece and flush at the bottom. Both are 2 1/2 inches, remember?

I cut a few images from some scraps of the pattern paper and adhered them to my base.

I stamped a sentiment on white cardstock, then layered it onto black chipboard. After three layers of foam tape on the back I stuck it down on my base. This serves as a stopper for the easel card to prop itself on when opened. (just in case you're not familiar with easel cards.)

I adhered the top portion of the main piece to the top portion of the base piece just above the score I made earlier.

Here's another look.

Next I adhered the frame piece from earlier using the same tacky glue as before and weighted it down with my heavy stapler for a few minutes. It doesn't take long. This glue dries quickly and clear too.

Now you can see what I meant about the label serving as a stopper for the propped up easel card.

I added this cute little vase and flowers to the top of the frame, after adhering some of the pattern paper to the back of the vase. This cutie is from Wendy Vecchi's Blossom Bucket line. Just love how sweet it looks here!

The coolest thing about easel cards is they lay flat for mailing. This one, of course, will have to go in a small box instead of an envelope.
I hope you enjoyed it, and I hope you'll give easel cards a try. They are so much fun and make very unique cards to give some special. Thanks for stopping by today. Have a great day!
This is fabulous! Thank You for the detailed instructions as I have never made an easel card. Never! I know, where have I been? Ha, ha, ha. Beautiful piece. Thanks foe sharing.
ReplyDeleteI agree with Sharon.... fabulous was the word that came to mind! Love the depth of the niche you created and the gorgeous flowers and vase. A beauty!
ReplyDeleteVery cool! I love all the layers and details. I really need to try one of these easel cards!!
ReplyDeleteAdorable easel card! Love all the layers and that cabinet is one of my favorites for making frames! Enjoy the day!
ReplyDelete