Good Monday morning. I promised I'd share my enhancements to the Close To My Heart "Florentine" Workshop on the Go (WOTG) so let's get right to it.
First take a look at the layout from the WOTG kit by Close To My Heart...
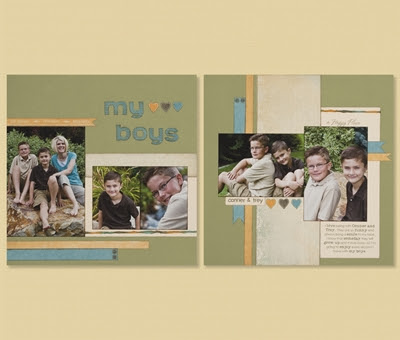


First take a look at the layout from the WOTG kit by Close To My Heart...

Close To My Heart keeps them simple and easy. No doubt about it. But you know, the Florentine paper pack has such beautiful paper in it, I couldn't resist changing things up a bit to add some warmth and depth.

If you look closely, almost all of the cuts are exactly the same only with different paper from the pack. I used Brown Bag card stock for the bases rather than Garden Green. And where photos will go, I made mats from Twilight card stock. I added some pewter badge buttons and couldn't resist adding some of our new Timeless Charms which are incredibly beautiful. (You'll see a close-up of those in a minute.)
Now I just wanted to share with you a little trick when you have a sheet of patterned paper like this...

Sometimes the design fills the whole page rather than a repeating pattern that you can easily cut and use anywhere. So for my pages, rather than cut a 4 x 12 from one of the other papers displayed in the WOTG, I used this piece above and cut two pieces at 2 x 12 of the left and right edge of the paper (shown shaded)...

...and put them together like this. Although the centers of the flowers are not perfect circles and I could have made my cuts bigger, I wanted to keep the layout true to the WOTG as much as possible, so I always try to teach my club girls that you can make small adjustments like this to enhance your pages simply.

And besides, once I put the pewter badge buttons in the centers of those flowers, it took away from the fact that they weren't perfect circles.

Here is one of those Timeless Charms I was talking about. They're not too heavy or bulky and add even more elegance to these Florentine pages.

Be sure to check out all the Timeless Charms here.

The zip-strips from the Florentine papers provide an added embellishment option for the pages. Here I added them to the bottom of the two photo mats.
With the ample amount of leftover papers in the WOTG I made three cards similar to the bonus projects.

(New Pattern)

Rather than stamping here, I colored our new Color-Ready Seam Binding ribbon with Creme Brûlée then created a dimensional flower with some of the pattern paper.

("Winning Combination" from Originals)

This Timeless Charm works beautifully here rather than stamping.

("Buckle" from Originals)

Layered stamping and some Liquid Glass accents add a lot of texture to an otherwise simple card.
Well, that's it for me today. As always, thank you for stopping by. I see that I'm getting very close to 400 followers, and I always like to celebrate hitting the next hundred level so if you like to stop by my blog often, be sure to become a follower. Once I hit 400, then I'll do a BIG prize give-away to commenters on that day. Stay tuned in the next few days and leave a comment on my big day, and I'll draw a winner. It could be you!
I'm off to take Tim Holtz's online card class now. Have a fabulous day!
Absolutely stunning Annette!
ReplyDeleteGreat choice of colors! Beautiful as always..
ReplyDelete